Making a DB9 console controller plug
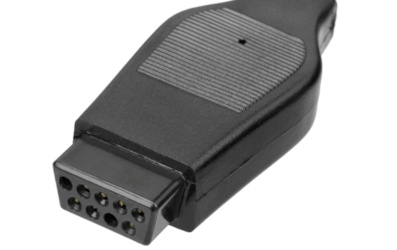
Many consoles of the 8bit and 16bit era tend to use a D-Sub connector for their controller ports, usually a male DB9 on the console and a female DB9 at the end of the controller cable. For instance, the Atari controller plug below is shared among other consoles like the SEGA Master System, SEGA Megadrive/Genesis.
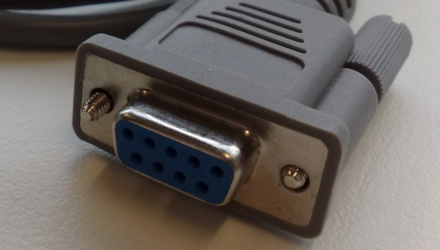
This plug is almost but not quite the same as the regular computer serial port cable with the main difference being the lack of the shielding around the plug or socket, and that the plug itself is significantly longer on the console version of this plug. This makes the “regular” serial port cables very unreliable to be used on a console because they tend to fall off from the socket because of the lack of insertion depth.
Buying Atari-style plugs today for you to make your own controllers can be a bit difficult or dirty. You either salvage an original controller or an extension cord from your favourite Shenzhen supplier, or buy new plugs from a reputable source at quite a markup. In any case it takes time and sometimes you need to do something quick that works with the stuff you should already have at arms length.
So the best solution would be adapting a regular female DB9 plug, the ones used to make your own DB9 cables, in such a way it increases the insertion length to the point it won’t fall off the console.
Ingredients
- Female DB9 plug
- Soldering iron & solder (anything would do!)
- Metal saw (or rotary tool or whatever you fancy)
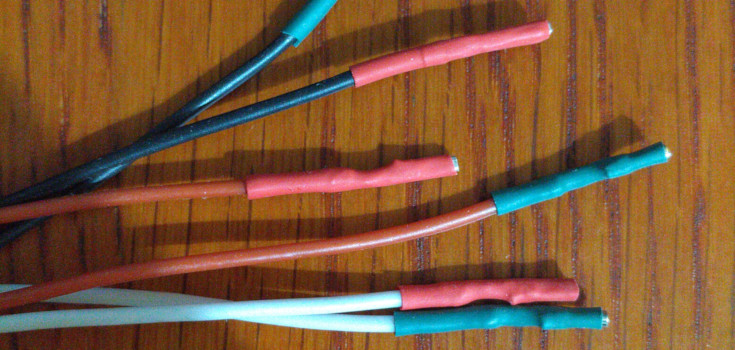
- Up to 9 wires to be soldered
- Hot glue gun or Epoxy glue
- Heatshrink, ~10mm diameter (optional)
Instructions
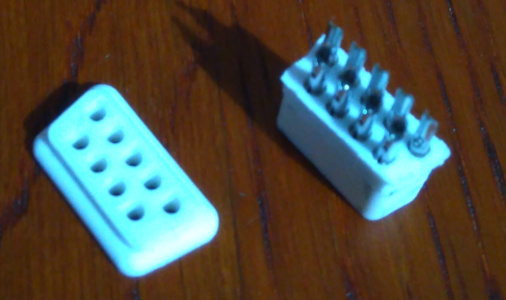
Start by sawing off the metal shielding of a blank DB9 connector. You can also drill the existing screw holes for the same effect. After that, remove the plastic backing holding the pins, and saw off the excess plastic at the sides of the plug, making it narrower while not losing any length. The result should be something like this.
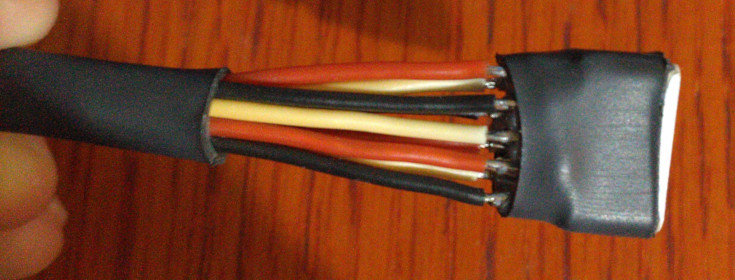
At this stage, solder any wires you need and place the pin in the socket. When you are done with it, use the hot glue gun to keep the pins in place since without the metal shielding and lid, there is nothing to keep them in place.
Finally, use a piece of heatshrink to cover the plug head and the solder side of the plug. Optionally add some more heatshrink to keep the wires from moving too much. The result should look like this.

To make connections to other circuitry easier, I added some female pins to the free end of the wires.
Finished result
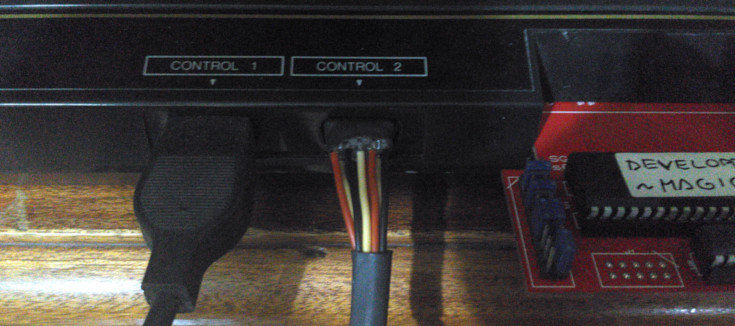
Here is the connector being used on my SEGA Master System.
Acknowledgements
- Atari plug picture by Evan Amos, Public Domain
- Serial cable picture by David Marsh, CC BY 2.0